
Now for animation. And I want to apologize for constantly changing the models I use for tutorials, I don't really have an excuse, I'll try to make this the last time I do it. For this introduction to animation I'll be using a honey badger model, already rigged. So, on that note, let us begin.
Truth be told, basic animations are not all that hard to accomplish as long as you know what to and not to select. In order to start animating, click on the armature and go into pose mode, here you can edit the position of each armature and the vertices assigned to them freely. Animation in Blender is based on and made simplified by a key frame system, making the animation process easy and the finished product smooth. Now to actually conducting an animation.

Now I deselect the entire object and jump to a point in the timeline a little further ahead, around frame 6. Make sure to deselect your object before adding a keyframe later in the timeline


 |
| Here is the honey badger, rigged and ready to be animated. |

Although you can manually put in keyframes, I prefer using the automatic keyframe setting, which can be enabled by selecting the two buttons which are circled in blue. Now when you edit a frame, a key frame will be added.
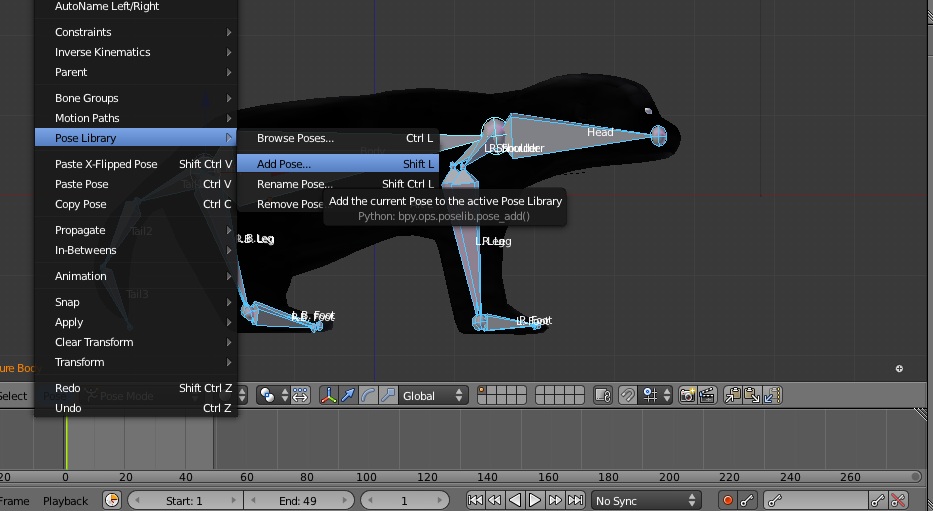
To start the animation, I'll keep honey badger in rest pose, this will be frame one. You can tell when a key frame is set by the yellow line that is marked in the timeline. You can save this pose in a couple of ways;
- Select the entire skeleton and go to Pose> Pose Library> Add Pose. When you save a pose, it will only save the bones you have selected. The same goes for copying poses.
- The other way is by, again selecting the skeleton, and clicking SHIFT + LKEY.
Now I deselect the entire object and jump to a point in the timeline a little further ahead, around frame 6. Make sure to deselect your object before adding a keyframe later in the timeline

Here is my new pose. If you play the animation (ALT+AKEY) you can watch how Blender makes the transition between the two poses smooth.
I deselect everything and jump ahead another 5 frames, adjust, and deselect.

After a few more frames are added, I set the object back to it's original resting position as the last frame, however, I set it so that the animation ends a couple frames before it reaches that last position, that way it smoothly loops into the beginning of the cycle.

When the model is exported, the animation is exported along with it, no tinkering with settings necessary. Hopefully this has been a helpful introduction to basic animation. If you have any questions, feel free to email the blog.
Comments
Post a Comment