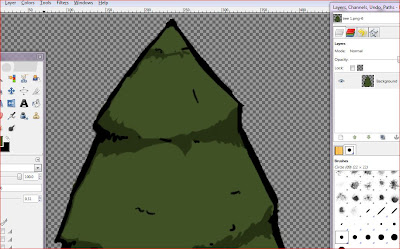
Some of you may think, "Dang, that's a clean looking tree." And in fact, like this, it looks pretty clean. And some of you if you drew a tree like this would sign it off as done and ready for some game action. However, if you take a closer look (About 200%)
Oh wait, those colors are still inside the lines! I guess it really is read-
WAIT. LOOK CLOSER. (In other words, add a black background)
Filthy, filthy tree. Tree is not ready for the game. So, now that you can see where all your little pesky errors are, you can whip that tree into shape
Which means you need your handy dandy eraser.
HOWEVER!
Before we start erasing, we are first going to select the black outline and copy it, and for those who don't know how to do so, this is how:
That is your magic wand, you want to select it.
Then you click on the black outline (note: this is for if your outline and and colors are on the same layer, if they are not (e.g. your outline is on one layer) then you go to that layer, hit CTRL + A to select, then CTRL + C to copy, and then CTRL + A to deselect.)
After you have the outline selected, hit CTRL + C to copy and then CTRL+ A to deselect.
Turn the black back on so that it is easier to see the mistakes while you erase.
Bam! Cleanliness. Now you can turn off the black layer or delete it all together. Once you do that, you are left with...
Ugh, those lines. Chances are that you erased some of your lines while you were trying to clean up what was outside of them. But fret not, for you copied your line art!
Simply hit CTRL + V
(If you had to use the magic wand tool, you may have to realign the lines a bit, but nothing too difficult.)
Hit that little anchor button to anchor the layer to the layer you were pasting to.
And NOW your pretty little tree is ready for your game. However, how do you keep a transparent background is something you may ask. There are two options to really choose from. Either a .PSD file type (Photoshop image) or a .PNG, both which save your image with a transparent background. I am going to save it as a .PNG because the file is smaller. When you save it as a .PNG, however, do not rush to just hit the 'export' and 'save' button. Take a look.
You're going to want to make sure that the bubble saying 'Merge Visible Layers' is marked rather than 'Flatten Image'. Flattening the image will give it a background, which is the opposite of what you (may) want.
The next window will look like this:
Make sure that the 'Save background color' box isn't checked. Once you have that done, go ahead and click that save button, you now have a proper, clean transparent image ready for your game!
By the way, be sure to check out our game at IndieDB and look at our dirty, dirty assets that I need to go back and clean up.


Comments
Post a Comment